Wi-Fi Network Setup
After completing “My Hackey account registeration” and writing down your PIN Code, please proceed to the next step “Wi-Fi Network Setup”.
Insert the USB – Micro USB cable into Hackey and after powering on, the Hackey LED’s should flash orange. (note: Orange flashing LED’s indicate that Hackey is in setup mode. Factory default status is setup mode, but if the Hackey LED’s are not flashing orange please press and hold the function button for more than 5 seconds to change Hackey to setup mode.)
Image (Press and hold the function button for more than 5 seconds)
Connect via Wi-Fi to Hackey using your PC, tablet or smartphone’s Wi-Fi connection application. It is recommended that you open the Hackey online manual in advance because you will have no internet connection while directly connecting to Hackey via Wi-Fi.

Image (Wireless LAN setting)
Hackey-000000
To find your Hackey’s Wi-Fi access point name, locate the serial number (MAC address) on the bottom of the Hackey device. Your Hackey’s access point name will be Hackey- followed by it’s serial number (for example Hackey-000000). A password is not needed to connect to the access point.
After connecting to the access point, open your web browser and enter the following URL.
http://192.168.4.1/
If you have correctly connected, the menu page will be displayed.
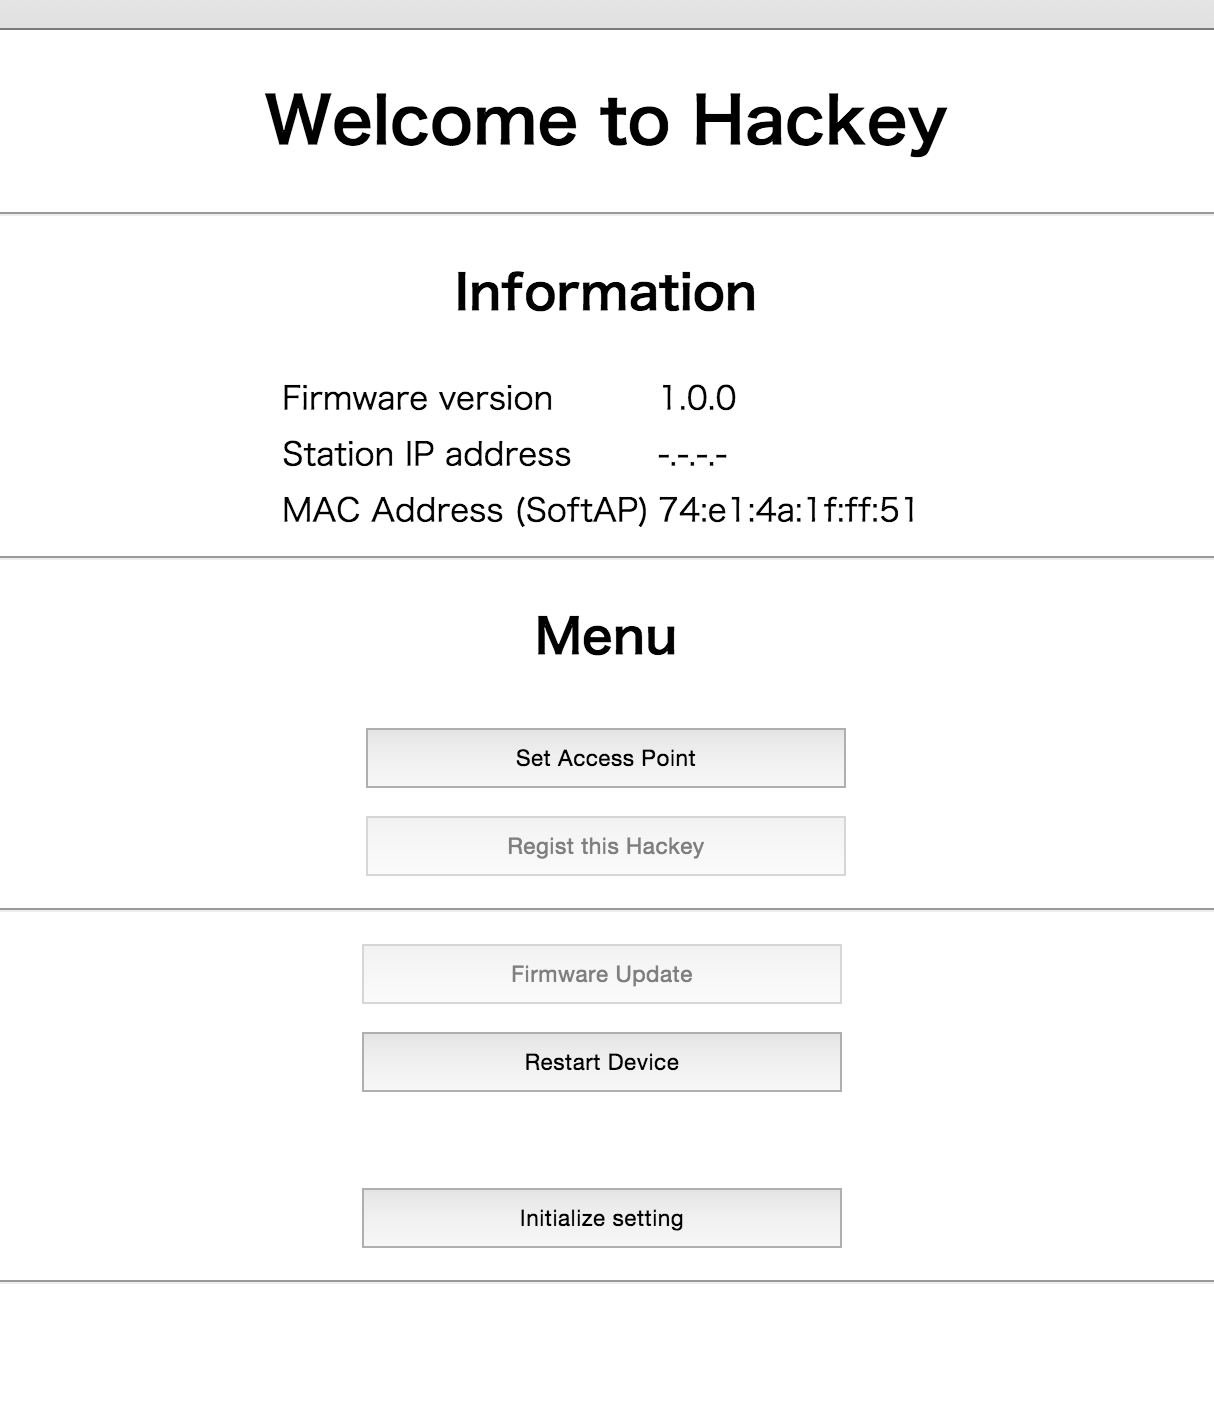
Please click the [Set Access Point] button to move onto the Wi-Fi access point settings page.
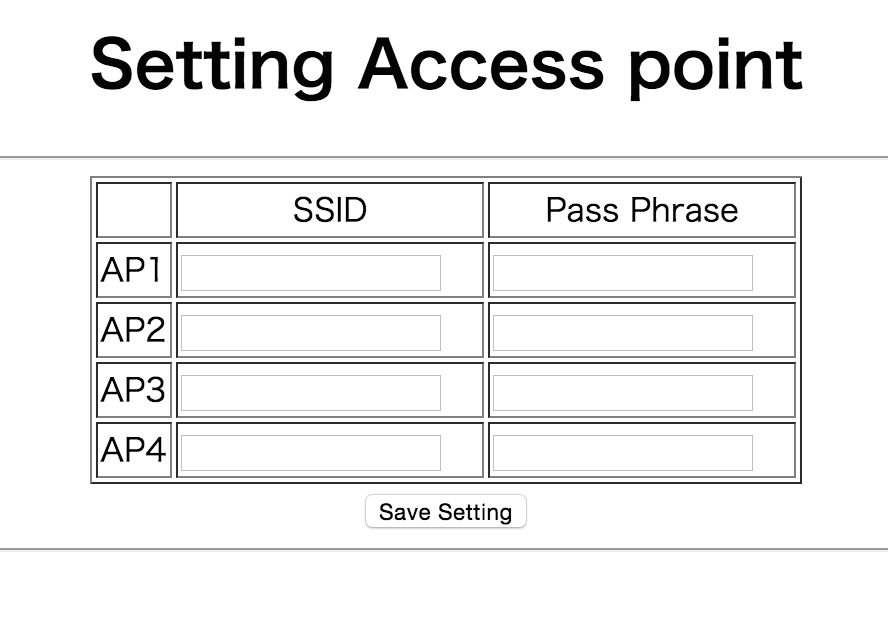
*Please note Hackey supports only the 2.4GHz Wi-Fi band. Hackey can not connect to 5GHz band Wi-Fi.
Enter the SSID and pass phrase of your Wi-Fi router or access point that Hackey will connect to in the blank spaces. Click the [Save Setting] button to finish access point setup.
After setup is complete the main menu display will be shown again. Please continue onto the next step.
Next step – 3. Hackey activation